

Every time I open the main hatch the engineer in me cringes at the scrape of fiberglass on fiberglass but at the same time realising it is not going to move on it's own so just accept it.
Have searched mods and forums but have seen nothing yet. Has anyone re engineered this and if so how?
Main hatch sliding
-
Tomfoolery

- Admiral
- Posts: 6135
- Joined: Tue Jul 05, 2011 7:42 am
- Sailboat: MacGregor 26X
- Location: Rochester, NY '99X BF50 'Tomfoolery'
Re: Main hatch sliding
Not that I'm aware of, but one thing I'd have never thought about if it weren't posted here in the past is that the hatch can actually scrape an opening for water to get in through. Who'd have thunk it?
If you come up with a fix, I'm sure a lot of folks would be interested in hearing about it.
If you come up with a fix, I'm sure a lot of folks would be interested in hearing about it.
-
JoeG

- Deckhand
- Posts: 37
- Joined: Mon Oct 08, 2012 7:04 pm
- Sailboat: MacGregor 26M
- Location: Key West, FL
- Contact:
Re: Main hatch sliding
This has been on my list of mods for awhile.
http://www.macgregorsailors.com/modt/in ... ?view=1318
http://www.macgregorsailors.com/modt/in ... ?view=1318
-
Divecoz

- Admiral
- Posts: 3803
- Joined: Sat Oct 16, 2004 2:54 pm
- Sailboat: MacGregor 26M
- Location: PORT CHARLOTTE FLORIDA 05 M Mercury 50 H.P. Big Foot Bill at Boats 4 Sail is my Hero
Re: Main hatch sliding
There is a teflon tape that could be used .. But do you want the hatch going back and forth at will?
-
raycarlson
- Captain
- Posts: 789
- Joined: Wed Jul 30, 2008 1:42 pm
- Sailboat: MacGregor 26M
- Location: tucson,az
Re: Main hatch sliding
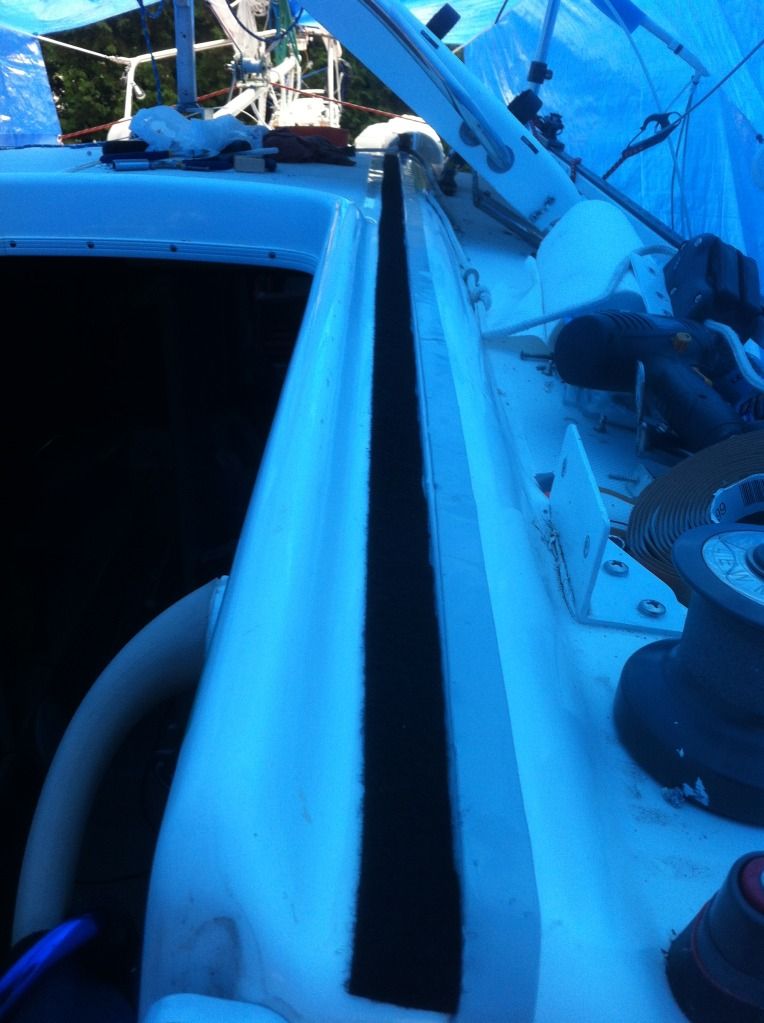
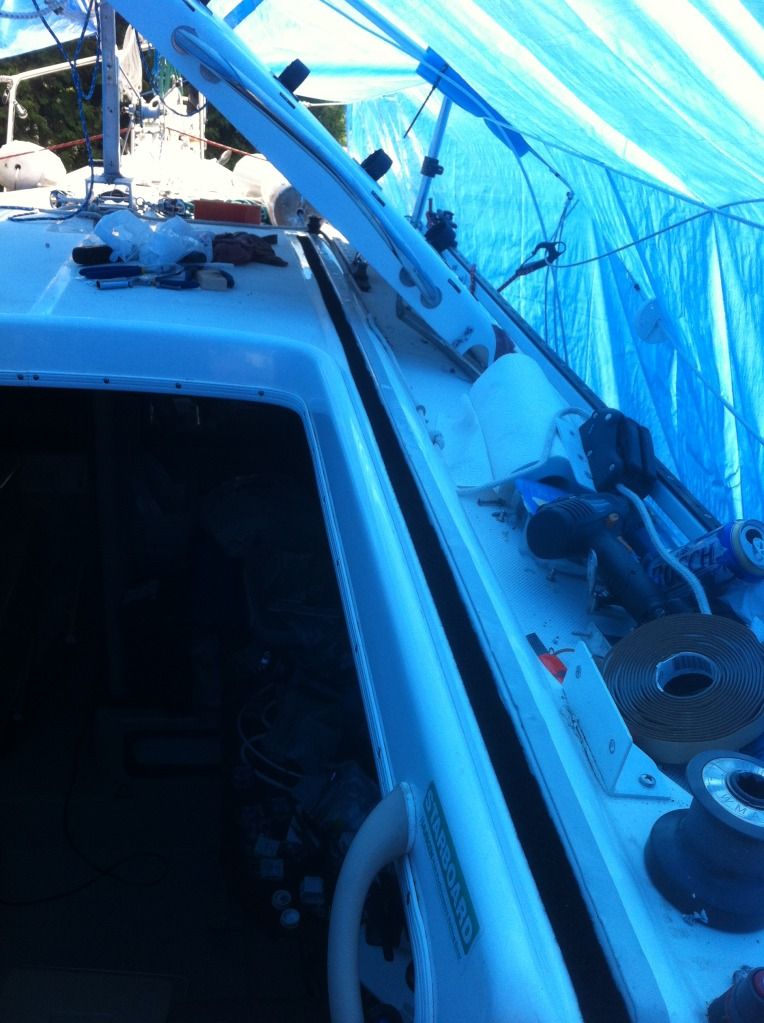
this one has been discussed off and on for at least five years that I have been hanging around,get some white 1 inch wide loop,not the hook side Velcro,sold everywhere.clean the edges with acetone near your plastic track cap-guides.then stick on the loop as far outboard as you can get it the length of the track.have to do it in two pieces,one hatcht all the forward one with hatch all the way back. this will last a good 3-5 years before needing replacement.
-
tlgibson97

- First Officer
- Posts: 218
- Joined: Mon Sep 24, 2012 5:33 am
- Sailboat: MacGregor 26X
- Location: Marietta, GA
Re: Main hatch sliding
I used some Japanese slide tape. My 16 year old boat was worn through the gelcoat in the slide area so I had to do something with it. A concern is having the hatch slide while standing on it but I haven't noticed much slipperiness in that respect. The only difference that I noticed is I have to lock the hatch when trailering or else it will slide forward when I brake. I've just started using it this season so I don't know how durable it is compared to the Teflon tape in the mod. The slide tape was a little cheaper I believe.
-
kmclemore

- Site Admin
- Posts: 6255
- Joined: Sun Feb 08, 2004 9:24 am
- Sailboat: MacGregor 26X
- Location: Ambler, PA -- MACX2018A898 w/ Suzuki DF60AV -- 78 BW Harpoon 4.6 -- 2018 Tahoe 550TF w/ 150 Merc
Re: Main hatch sliding
Jimbo, I agree with Ray.. this has been a common area of discussion.
Try an 'advanced search' and look for 'hatch slide noise'.
http://www.macgregorsailors.com/forum/s ... mit=Search
And as noted, either Velcro or Teflon slides have both been popular.
Also, as noted by Dimitri in 2004 (see: http://www.macgregorsailors.com/forum/v ... 4427#p4427) the noise is not from the sliding of the hatch, but from the front edge of the hatch rubbing on the cabin top. The Velcro or Teflon lifts the hatch slightly and also provides for reducing wear on the cabin top in the slide area.
Re: Main hatch sliding
Yes pay attention to advanced search and search results next time. Thanks all.
-
Russ

- Admiral
- Posts: 8299
- Joined: Thu Oct 11, 2007 12:01 pm
- Sailboat: MacGregor 26M
- Location: Bozeman, Montana "Luna Azul" 2008 M 70hp Suzi
Re: Main hatch sliding
I did the velcro mod. Doesn't scrape glass on glass anymore, but it also doesn't seem that much smoother sliding. But at least I know it's not wearing through fiberglass. I've seen some that have worn through, this is something everyone should do.
--Russ
--Russ
-
DaveB

- Admiral
- Posts: 2543
- Joined: Mon Jan 07, 2008 2:34 pm
- Sailboat: MacGregor 26X
- Location: Cape Coral, Florida,1997 Mac. X, 2013 Merc.50hp Big Foot, sold 9/10/15
Re: Main hatch sliding
My clearance between the stainless steel flat track and lip on the Sliding hatch has only 1/8 inch or less vertical room clearance.
I will run 1/16 inch thick tape on both sides 1/2 inch between them and run a puddy knife at top to get it smooth useing Marine Tex white Epoxy.
This will give you a strip 1/6 inch high x 1/2 inch width that hatch slides on and a place were dust, light sand can run off both sides so it doesn't wear the hatch and deck.
The Epoxy is much harder than gelcoat and polyester resin and would take lots of years to wear that 1/16 inch down.(if you have room for a 1/8 inch height ,go for it)
Another option is to put a Aluminum 1/8 inch thick under the track to raise it and add a thicker epoxy bead. (if you do that than would do the same to under side of Hatch lip) That way you have epoxy on epoxy and 1/2 inch wide.
Velcro doesn't hold up here in SW Florida even if you mounted it with 3-m 5200.
Dave
RussMT wrote:I did the velcro mod. Doesn't scrape glass on glass anymore, but it also doesn't seem that much smoother sliding. But at least I know it's not wearing through fiberglass. I've seen some that have worn through, this is something everyone should do.
--Russ
-
Boblee
- Admiral
- Posts: 1702
- Joined: Thu Aug 10, 2006 5:08 am
- Location: Berrigan, Riverina Australia boatless at present
Re: Main hatch sliding
Velcro has worked for me for many years and also under the rear seat on wear spots, makes it better when in crowded areas to open and close without moise too.
-
Highlander

- Admiral
- Posts: 5995
- Joined: Wed Sep 21, 2005 8:25 pm
- Sailboat: MacGregor 26M
- Location: Maccutter26M 2008 75HP Merc. 4/S Victoria BC. Can. ' An Hileanto'ir III '
- Contact:
Re: Main hatch sliding
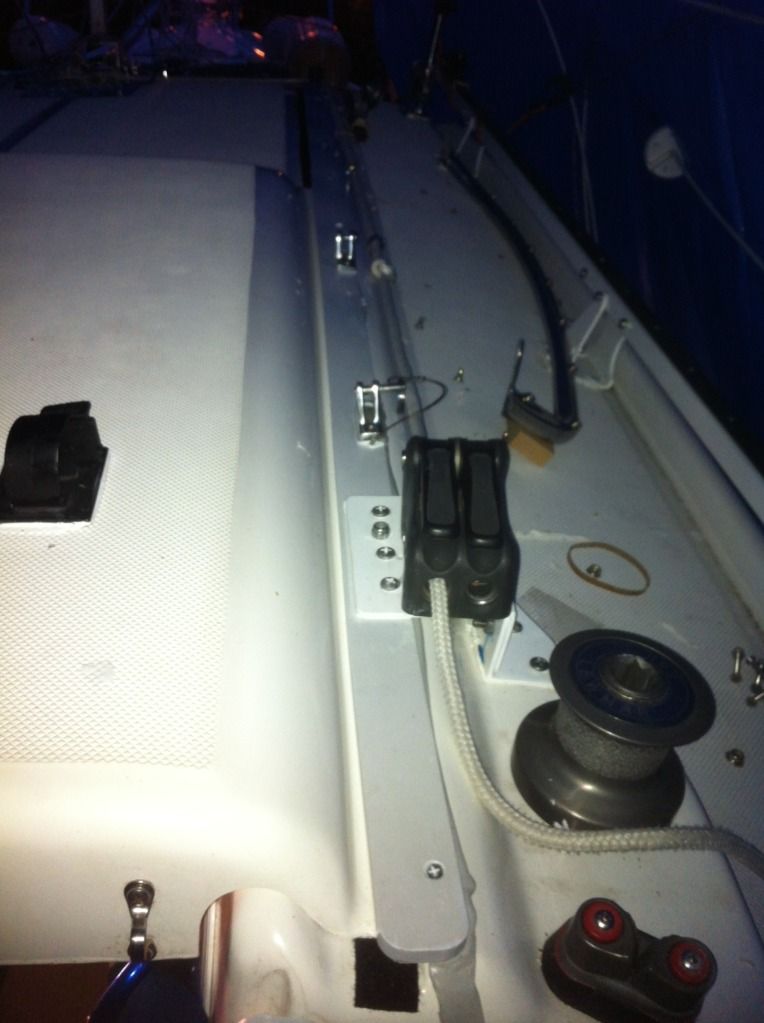
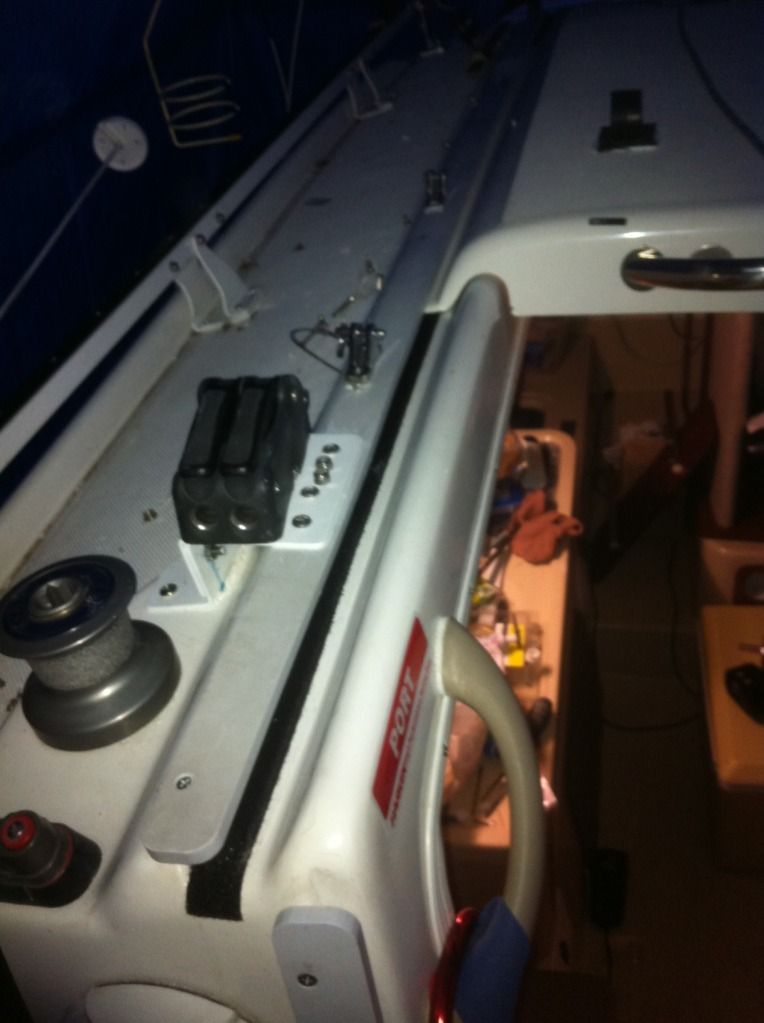
When I had my sliding hatch off last yr because I had small pin holes in the gelcoat there leaking water into the cabin I done that mode puting the velcro tape on there , but if I were to do it again I'd use the opisite side the plastic side with the little teeth will slide easier & clean out better the the velcro side
http://i844.photobucket.com/albums/ab1/ ... G_0834.jpg
you can also see the butylne tape I put on top of where the retaining strips go the keep the sliding hatch in place this is also to prevent leaks @ the mounting holes
http://i844.photobucket.com/albums/ab1/ ... G_0835.jpg
http://i844.photobucket.com/albums/ab1/ ... G_0838.jpg
http://i844.photobucket.com/albums/ab1/ ... G_0842.jpg
http://i844.photobucket.com/albums/ab1/ ... G_0843.jpg
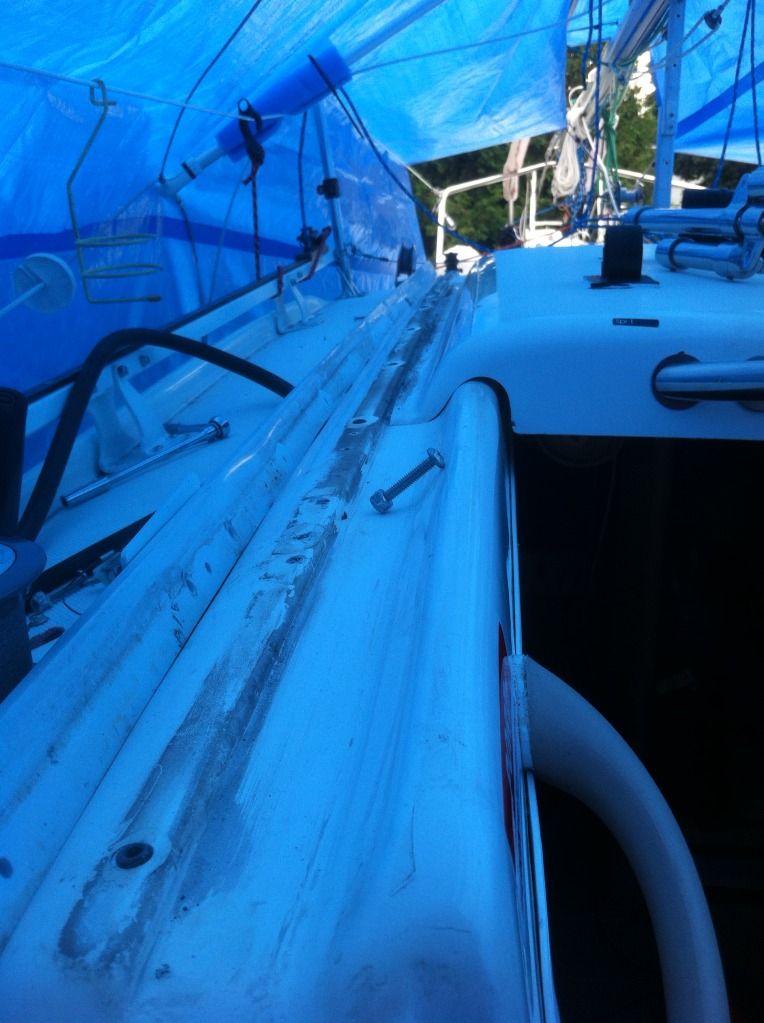
In this pic u can see the hole in the gelcoat where the screw is right at the end where the nut is see the little black hole u'd be amazed how much water this let in & ended in the aft berth
http://i844.photobucket.com/albums/ab1/ ... G_0818.jpg
J
http://i844.photobucket.com/albums/ab1/ ... G_0834.jpg
you can also see the butylne tape I put on top of where the retaining strips go the keep the sliding hatch in place this is also to prevent leaks @ the mounting holes
http://i844.photobucket.com/albums/ab1/ ... G_0835.jpg
http://i844.photobucket.com/albums/ab1/ ... G_0838.jpg
http://i844.photobucket.com/albums/ab1/ ... G_0842.jpg
http://i844.photobucket.com/albums/ab1/ ... G_0843.jpg
In this pic u can see the hole in the gelcoat where the screw is right at the end where the nut is see the little black hole u'd be amazed how much water this let in & ended in the aft berth
http://i844.photobucket.com/albums/ab1/ ... G_0818.jpg
J
-
bscott
- Admiral
- Posts: 1143
- Joined: Mon Mar 08, 2004 2:45 pm
- Sailboat: MacGregor 26X
- Location: Arvada, Colorado 2001 X, M rotating mast, E-tec 60 with Power Thruster, "HUFF n Puff"
Re: Main hatch sliding
What is the best way to totally remove the hatch? How are the top moldings fastened?
The silt build up under the hatch is like cement and it looks like removing the hatch would be less time consuming and do a better clean out for a lasting tape install.
Bob
The silt build up under the hatch is like cement and it looks like removing the hatch would be less time consuming and do a better clean out for a lasting tape install.
Bob
-
kmclemore
- Site Admin
- Posts: 6255
- Joined: Sun Feb 08, 2004 9:24 am
- Sailboat: MacGregor 26X
- Location: Ambler, PA -- MACX2018A898 w/ Suzuki DF60AV -- 78 BW Harpoon 4.6 -- 2018 Tahoe 550TF w/ 150 Merc
Re: Main hatch sliding
If you gently flex it, you can easily pop the hatch out of the slides. However, if you want to do it the 'right' way, you'll need to remove all the screws in at least one of the slides.
-
Hardcrab
- Captain
- Posts: 868
- Joined: Tue Sep 19, 2006 8:25 pm
- Sailboat: MacGregor 26M
- Location: "Cease-fire", White 05 M, 90hp, Boggy Bayou, Niceville, FL
Re: Main hatch sliding
bscott,
The hatch is easy to remove.
Either side hatch rail would work, but I'll describe the port hatch rail.
Remove the switch panel to access the aft most rail nut/screw.
They are long screws, so use a deep socket and phillips.
Remove that one and then the interior trim plugs for the next five going forward to get at those nuts.
The trim plugs have a section in the diameter that pushes in to "uncatch" the hole.
A thin bladed screwdriver works okay
Your arms are long enough with hatch open, no help required
The rail material itself is somewhat flexable, so no worries about it breaking.
Also, the factory sealant is also flexable, (not 5200), also a good thing.
Once the rail is bent towards the port and up, the hatch slides back and up, also towards the port, and it's yours.
No more bending the rail than what is needed works fine.
I suppose if you get nervous, all ten screws could come up to remove the rail, but really not required.
If you plan to do the velcro mod, reseal the screws with something easy for any future removes.
I used just a simple plumbers putty under the screw heads and around the shafts and it's worked fine going on three years.
Still waiting for the velcro pile to wear thin needing to be replaced.
Be sure to have some excess velcro length so you can turn the ends up and on the top side of the hatch for a few inches.
This really protects both leading edges so they don't peel off in normal use.
On EDIT:
The X and M are a little different in the removal methods, I do believe, and I described the M.
Sorry.
I need to read better.
But maybe someone else can use the info.