I back into slips because the boat box is always way down there at the front end of the slip and on the M boat it's easier to walk out the transom to get on and off the boat so I put the back in there anyways. Also on windy days I find it easier to back into tight slips that have little room around them to maneuver - in reverse the back of the MAC seems to just go wherever the motor points it no matter how strong the wind is blowing and even if your going a little fast the boat stops pretty fast in reverse when you put it in neutral. I'm not a power boat guy, it's just easier. (I wonder why?)
BOAT wrote:I back into slips because the boat box is always way down there at the front end of the slip and on the M boat it's easier to walk out the transom to get on and off the boat so I put the back in there anyways. Also on windy days I find it easier to back into tight slips that have little room around them to maneuver - in reverse the back of the MAC seems to just go wherever the motor points it no matter how strong the wind is blowing and even if your going a little fast the boat stops pretty fast in reverse when you put it in neutral. I'm not a power boat guy, it's just easier. (I wonder why?)
Many others claim the same thing. I may try backing in next season. Not sure how you walk out the transom with the motor there.
I leave the motor and the ladder down and just walk right past the motor on the same side the ladder is on - the top of the motor makes a great place to put your hand on when you step down.
Well, first the home slip is like a fingerdock, has a V on the dock, so I can just park bow first.
Second: I ones morred back first at the dock in a mediterranien port becouse all the others did so. This was pretty bad. I had to jump down, then I had to make me small becouse of the bimini down... and the same time also carring lots of bags/beers...
It's not a great way to park if you have a lot of offloading to do - that's for sure - I am always only an overnighter at a slip - never an extended stay so the back in is not a big problem.
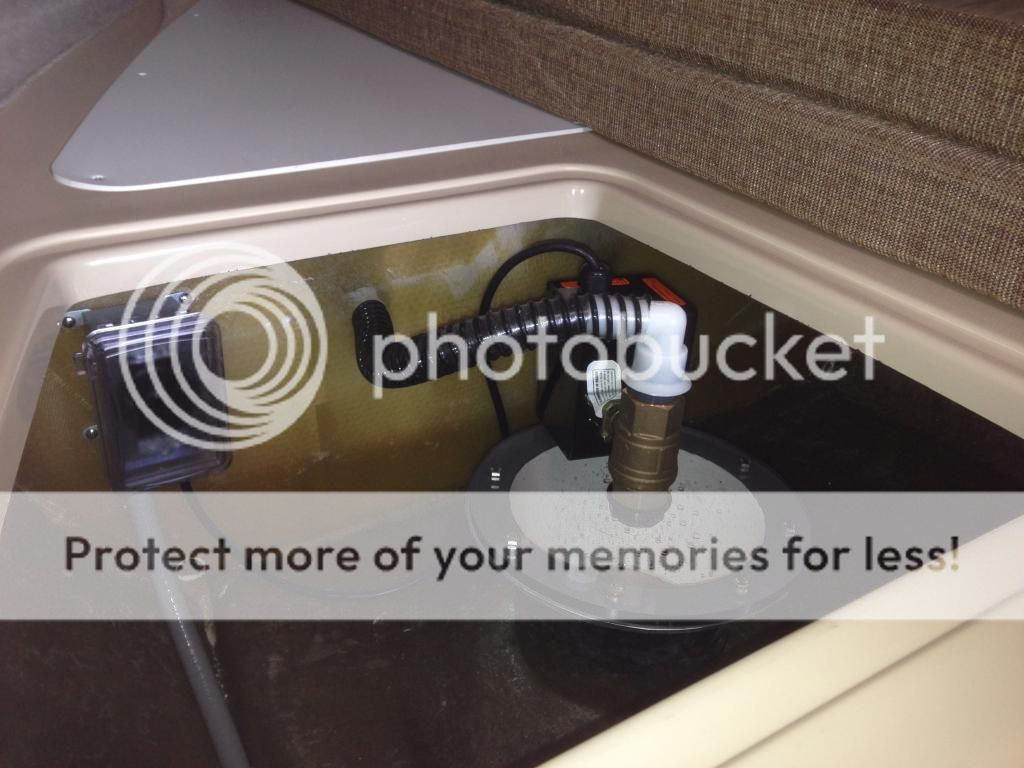
I don't do it that way anymore. Now it's like this:
This is better because it allows you to see the water in the tank. This way is also better because it has a much larger air vent so the tank fills and empties a lot faster.
The 1 inch electric brass valve comes from Water Cop but if you buy direct it's too expensive - get it from irrigation supply or tool supply places online. Or use any 1 inch electric valve of your own choice. I wanted brass. The over-ride switch is a standard switch I put in a standard "in use" waterproof box. The over-ride switch is only there as a backup in case the helm switch fails or you can't get to the helm for some reason.
The valve only uses electricity to open, or to close - the rest of the time it needs no electricity to stay open or to stay closed. The hoses and elbows are standard PVC plumbing stuff. You don't need to run your wires in seal-tight flex like I do - on 'boat' all 12 volt wires that are in the bilge are in seal-tight flex. that's just the 'Navy' way to do stuff, it's not required on you boat.
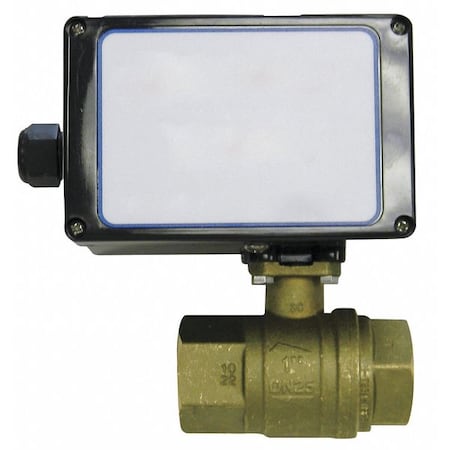
Thanks for the extra info. I need to find a valve like that for my project but have no idea who makes anything like that or what it's called (so I can search for it on the web) ... Could you please tell me the manufactures name and model?
My Mac is floating in the Marina for the next 3 weeks but when I get it back home I want want to start working on this project. I also believe I have a good solution for water level indication (Almost empty / 1" from top / Full) and will share that on the forum after I've tested it out.
Been thinking about the ballast gate valve....
Any air in the ballast tank on a hot summers day (in or out of the water) would exert a significant amount of pressure on the gate vale when the air expands .... Try taking the Vent plug out at the end of a hot day and you'll know what I mean. ....This is another good reason to do the Ballast Vent modification.
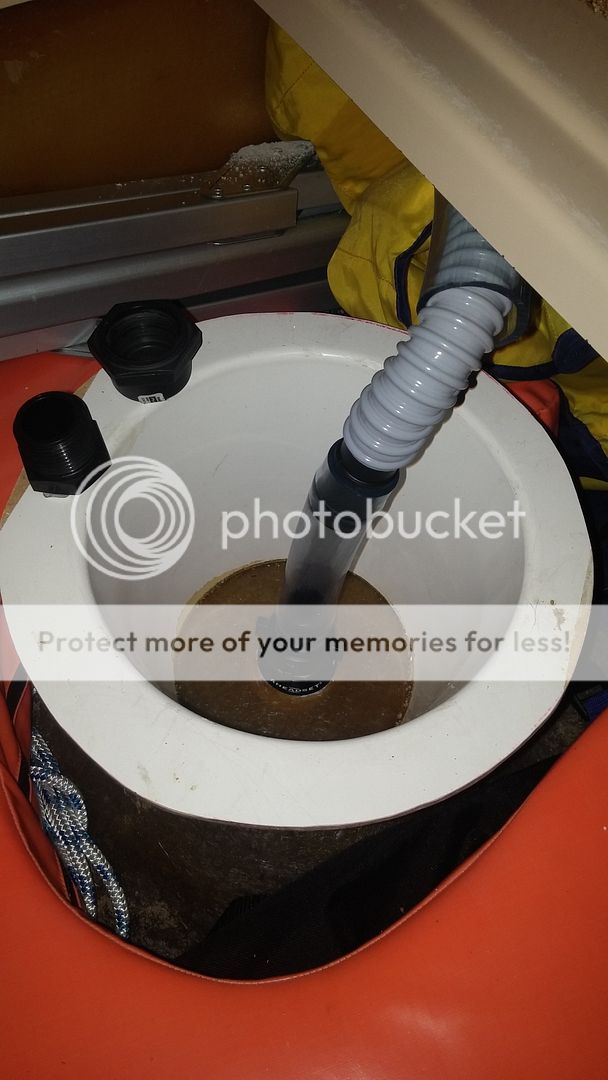
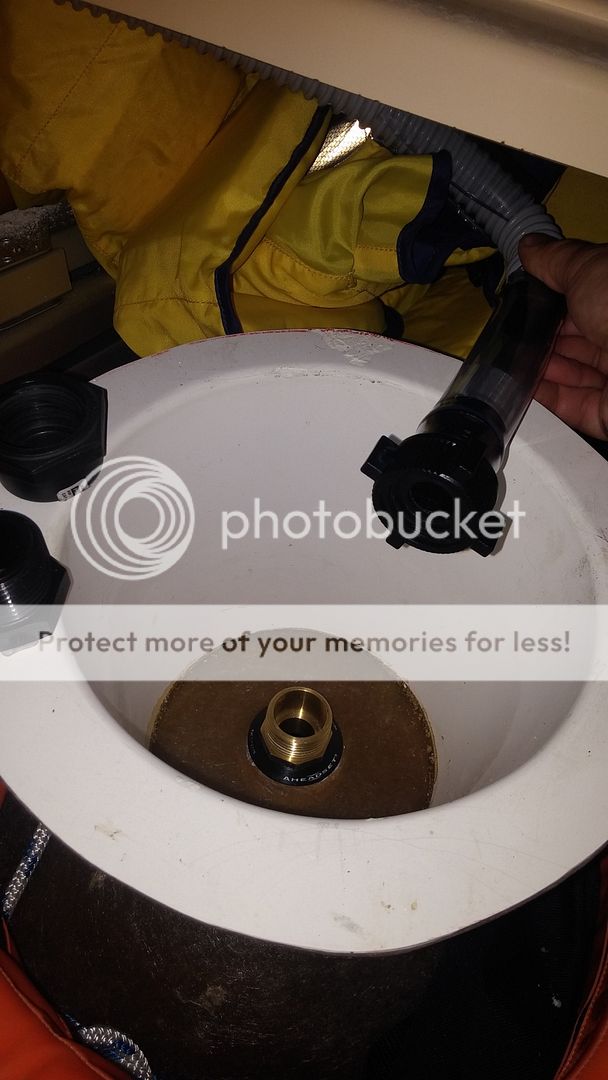
I screwed down a a brass fitting (with Silkaflex) to a detachable plastic connector, then clear tube, then re-enforced flexible tube, high loop all the way to a T-Connector (replacing the elbow) at the top of the bow.
I can also cap off the tank or vent tube, if need be.
That' the re-enforced hose going from V1/V2 through to the aft locker (the one filed with polystyrene).
It looks odd because I drilled the hole in between the two (V1/V2) lockers (under the center support beam) to keep the tube well out of the way.... the picture was taken before the hose was supported.