WOW! It was harder and more time consuming to find out how to load software on the microprocessor than I would have thought. I didn't want anyone to have to install the full development environment. It can be a PITA even when you want to program the things. Since 99.99% of the people seem to use that method, it was a little buried on the Internet on how to do this 0.01%.
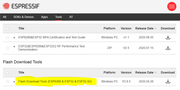
STEP 2A - Download the utility from the microprocessor manufacturer. Here is the link to a long list of developer tools:
https://www.espressif.com/en/support/do ... ther-tools
You'll need to download the highlighted one. It is for Windows. Sorry Mac people, I didn't see one for you. After the download you'll need to "
Extract All" to some folder. It is ready to use and doesn't require an install process.
STEP 2B - Download my application
https://inqonthat.com/wp-content/upload ... .1.0.0.zip. It too, will need to be extracted and you will find a single bin file:
InqWaterLevel.1.0.0.bin
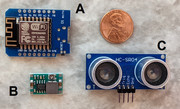
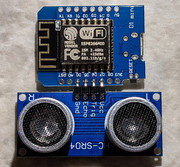
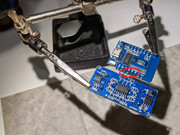
STEP 2C - Using a USB micro cable, connect your WeMos microprocessor to your computer.
STEP 2D - Run the exe found in your extracted tool folder:
flash_download_tool_3.8.5.exe (or whatever version you get). It is not the most user friendly piece of software I've used and is mainly a developer's tool. We're supposedly more tolerant of bad UI design.

Hey... but it's free. It will pop up a command window and the first choice:

Select the
Developer Mode... You'll get:

Select the
ESP8266 DownloadTool... You'll get:
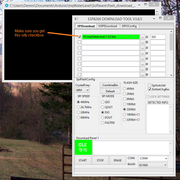
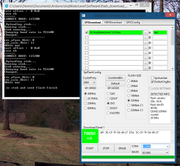
Fill out all the boxes as you see in this image. If you miss something, the error messages are either non-existent, in Chinese, or cryptic.
- Obviously, the first green highlighted box is referencing the bin file you downloaded to some location on your computer. Yours will be different.
- Make sure you get every item filled out... especially the little check box that I missed and for the longest time and couldn't figure why I wasn't getting anything uploaded.
- The COM: COM4 port will likely be different on your computer also. It should be in the drop down to select.
STEP 2E - Press the
ERASE button. This will erase the memory on the WeMos board. It took about ten seconds to "FINISH" as shown here. You get a little diagnostics (shown) in the command box.
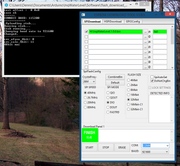
STEP 2F - Press the
START button. This will upload the binary to WeMos board. It took about another tens seconds to "FINISH" as shown here.
STEP 2G - Did I really get it uploaded? Leave the WeMos microprocessor plugged up. We will go through a thorough testing after we have attached all the hardware. For now... we just want to see if we successfully uploaded the software.
On the WeMos, next to the USB cable you will find a small
RESET button. Press this. This will "boot" your microcomputer for the first time. For this boot up, there are a lot more things that have to happen just this first time. It has to install the OS and format the "
hard disk". It takes about 15 to 30 seconds. After this first time, normally the boot is less than a second.
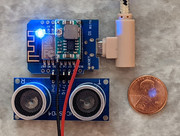
- Once booted, you should see the blue LED on the WeMos continuously flash on and off... 1 second on... 1 second off.
- Now... use any device that can connect to a WiFi. This can be your computer if its has WiFi or any mobile device. In your WiFi connection configuration screen, you should see a new connection available: InqWaterLevel
SUCCESS!