Huh ?? slink off ?? I was trying to be apologetic for bringing this mod up again. Not sure if it is allowed in the thread....

ok, it is acrylic sheet, 1/4", bought from a plastics supply company, as the whole 4x8 sheet. The sheet was about a hundred bucks, that is 5 years ago, and the cuts were either nominal or free ... maybe a dollar each, there being maybe ten cuts total.

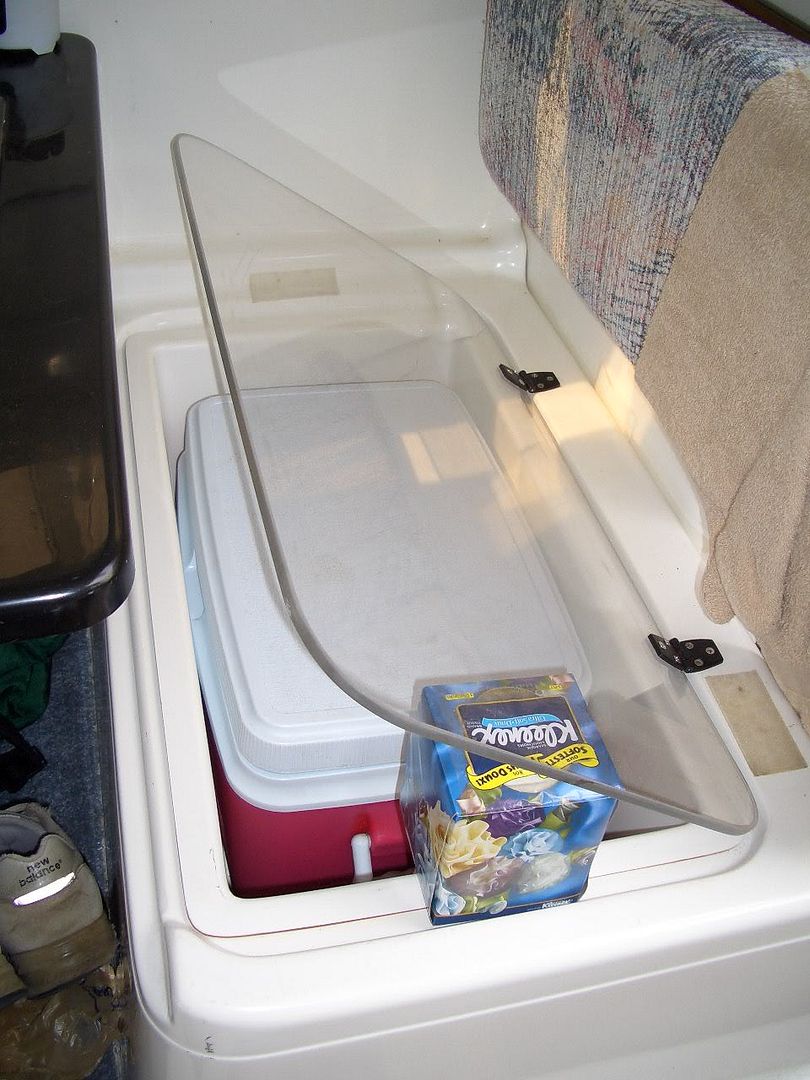
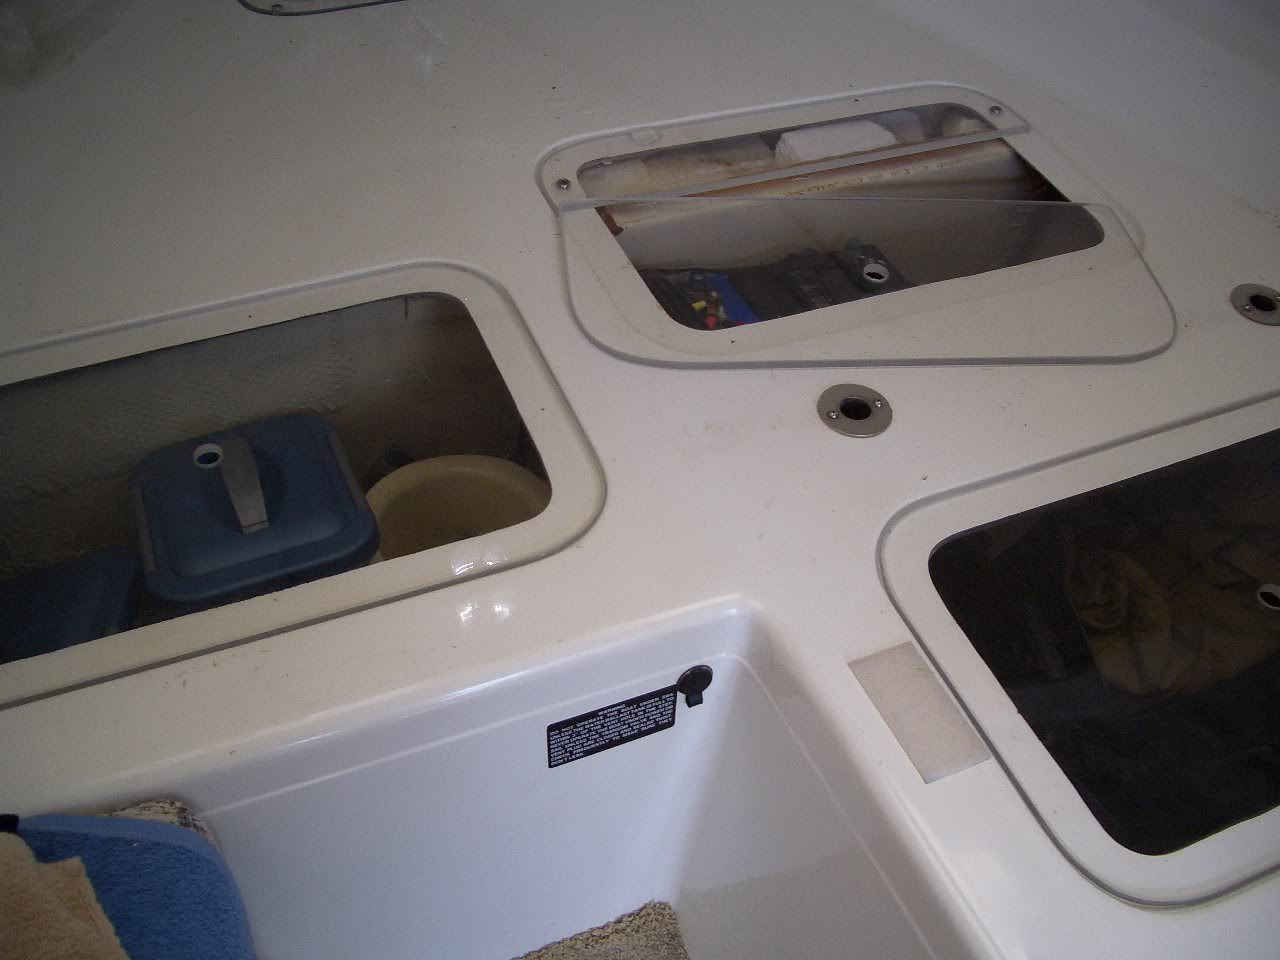
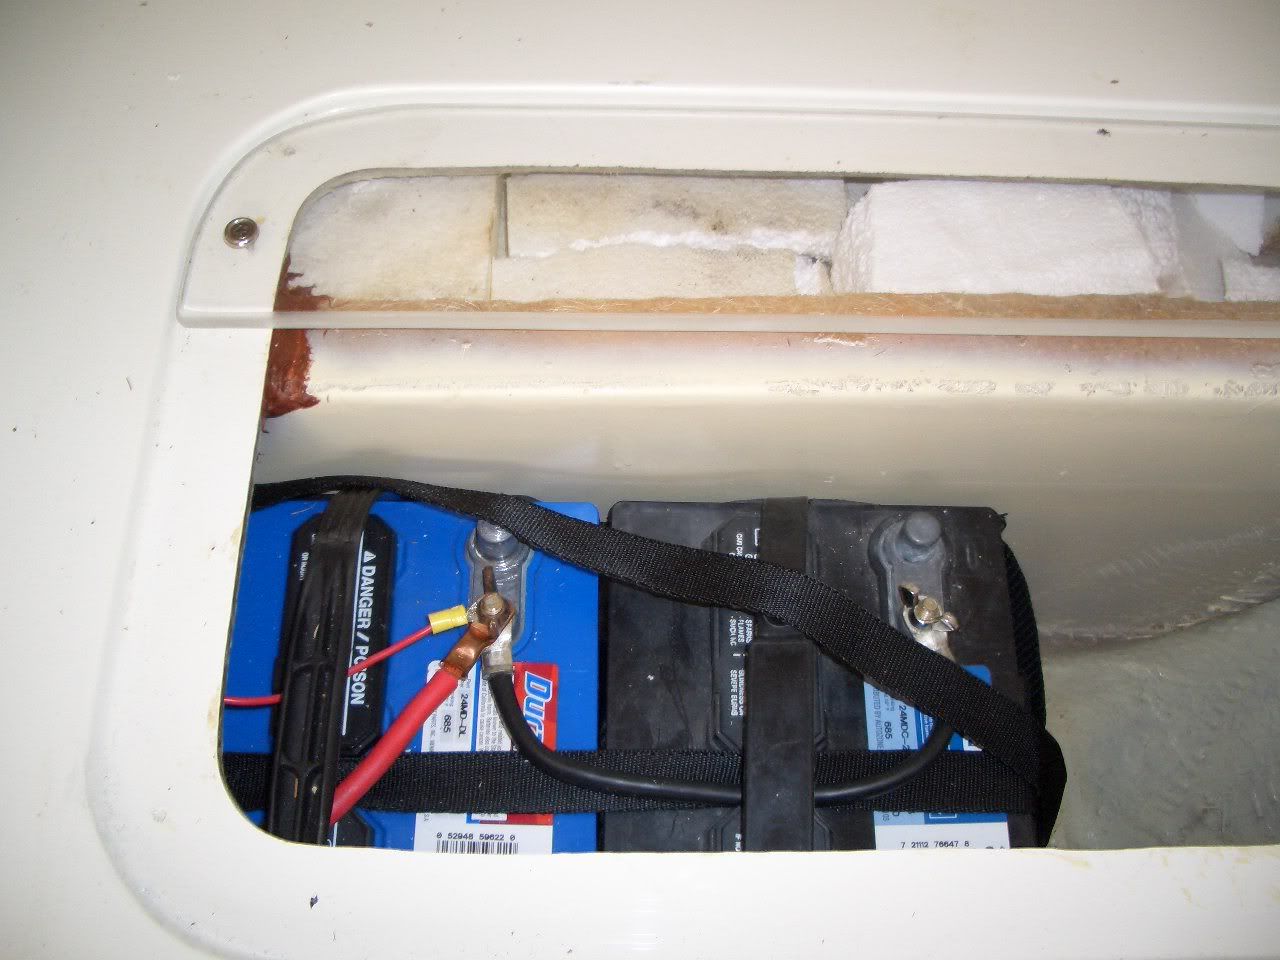
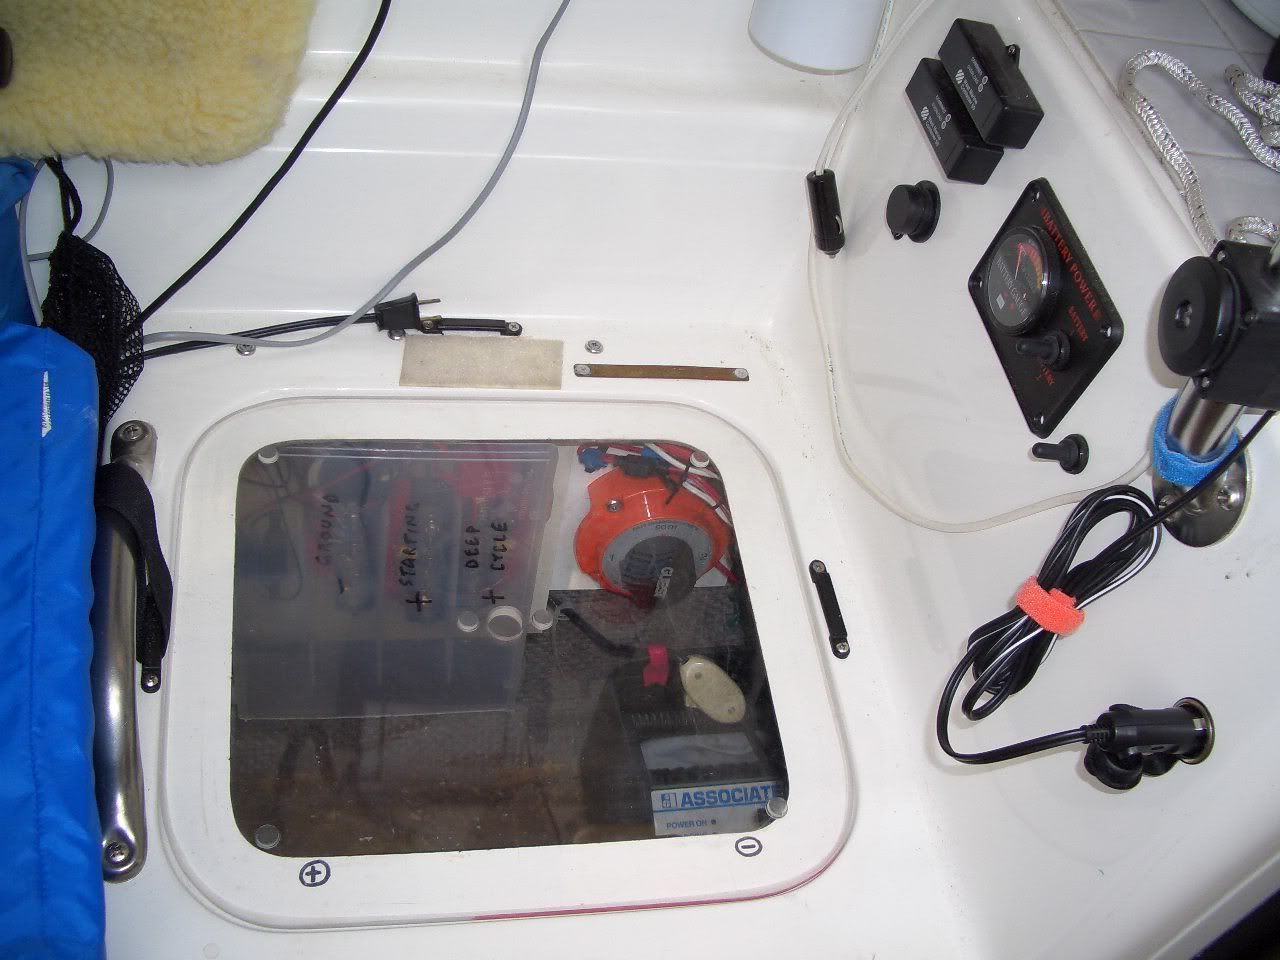
Measuring the X-boat's original masonite fiberboard covers, allmost all the same size, except for the big cooler under the aft settee bench, and the battery compartment cover aft the galley. I laid out the pattern of cuts to the sheet. 'Found that the cut pattern had to be done in a certain order, ( Dutch-cut) , to maximize usage and get the sizes all out of the one 4x8 sheet. I think two or four of the pieces had to be turned the opposite way on the sheet. I used pencil and paper to figure it out, but If you'd rather do it visually - just chalk a 4x8 on the driveway, and see how best to lay out the cuts, using two or three of your covers from the boat. Keep in mind there will be some kerf loss to the saw blade's thickness, usually about an eighth of an inch per cut.
Then I provided the cutting pattern and measurements to the plastics company and they cut the sheet up for me, in their production shop while I "supervised". I'm a photographer slash carpenter so I get chummy with the production guys.
That's all I needed from them, but could have done the cuts myself, but why ?
I left with the cut pieces having rough square edges. At home and on the boat, 'compared the original covers to the actual depressions in the liner, to make the best radius, and then traced that radius on the corner of each new cover, with a Sharpie pen. There are probably 12 or 15 covers, and that makes alot of corners, but the belt sander works fine to quickly round the corners and grind off the edges. The friction heat makes a mess of the ground off "sawdust" plastic flashing, but just let it cool a minute and it usually just breaks off brittle when it cools, or tear it off while it is soft if your fingers can take some heat. ( Comparable to changing a lit lightbulb ). A lightweight belt sander makes the work less tiring. Hand sanded to smooth out the belt sander irregularities and left the edges slightly frosty, rather than take the time to flash them glossy. Maybe used an electric palm sander for the finishing.
Then a Forstner type bit, I think, makes a neat hole in the center, without producing a stress crack. 'Harder to explain than just look at one in the hardware store if you're not familiar. One trick with alot of sheet material is to drill one side until the pilot-point hole appears on the other side, then drill from the second side to avoid the thru-cut from being completed at the surface. The holes' edges were radius-smoothed with a Dremel and drum sander attachment, and then by hand with sandpaper. For smaller holes. like in the hinged cover where thru bolts and nyloc nuts hold the hinges to the acrylic, there are spade shaped drill bits, made for tile, glass, and plastic sheet, that minimize the risk of stress cracking. You can count on problems if you use the common type of twist drills, and probably paddle bits as well.
To screw acrylic directly to the fiberglass / gelcoat, just pilot drill the acrylic slightly oversized, so the screw will be loose, and just the right amount in the fiberglass to minimize cracking of the gel-coat and maximize the grab on the screw. I don't bother with nuts and machine bolts except for the hinges on the settee cooler's cover. Then use the bugle head counter-sunk type screws with finish washers, which have a humped profile and nest the screw heads. The washers cover the oversize holes, and don't overtighten them, so there is a bit of slide for the acrylic as it expands and contracts, without causing stress cracks or pulling the screws loose.
Basically the acrylic "works" pretty well, being much more consistent than wood.

Whereas Polycarbonate is unbreakable, but many times the cost, the acrylic in 1/4 inch is strong enough to take sitting on, however can be broken. None of the ones I use have ever broken or cracked. One cover, which is over a bulkhead in the bow, is split to allow forward battery access, but the other part stays screwed over the flotation part forward, as seen. For the cut, I think I used a jigsaw with metal cutting bade, very fine teeth, and a felt sheet adhered to the saw's foot to avoid scratching the acrylic.

One thing to consider .... the covers in the rear berth are over very shallow areas, not much good for storage, and so replacing their covers not as useful, except many of the original covers on my X had "potato chip" warp and would not lie flat. But the acrylic covers are a little heavier, and to minimize aft weight, consider leaving them as is. You will have lots of spares, or some extra sheet to make a hatch cover out of, if you don't figure on using clear sheet over the aft berth storage holes.
More info than you wanted