Cheap Electronic Water Bladder Level Meter
Posted: Wed Mar 03, 2021 8:44 am
For my Mac renovation, I've been bouncing around on what kind of water storage. Hard tanks, bladders, multiple OEM 5 gallon carriers, putting something in the ballast tank... nothing was discounted without some thought. In some things, I try to use the KISS principle (others... not so much  ). Water bladders seem to me to be about the simplest by the time you consider the full installation. In the same timeframe ris just happened to show his system viewtopic.php?f=8&t=28112. I really like the thoroughness of thought that went into it. The only concern I had was not knowing how much water I'd have left in the bladder hidden under the V-berth... especially if I had non-economical users on board. JimmyT came up with a great idea viewtopic.php?f=8&t=28112&p=347984#p347982 that I thought I could simplify just a little with one of my other hobbies... microprocessor programming.
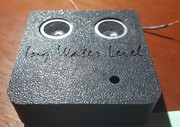
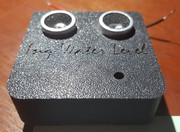
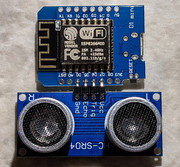
Here is the finished design...
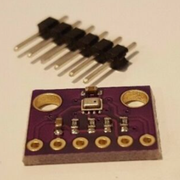
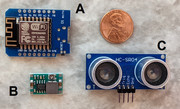
It uses three cheap, off-the-shelf parts easily obtained through eBay.
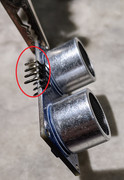
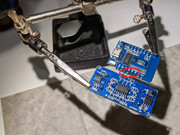
Assembly requires a small amount of soldering. Programming requires a PC and a USB-micro cable. I host/volunteer for a local Maker's group in my small town. One user wanted to use a Mac and I know it can be done, but we couldn't get it working. I don't speak Apple.
I printed a 3D case for it... well... because I can and it was faster, lighter and better looking than one made of wood.

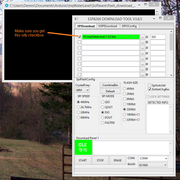
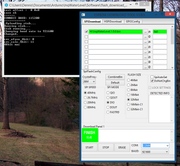
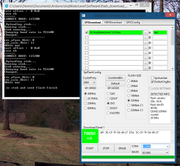
The software is uploaded via the USB the first time.

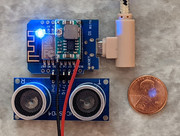
And lastly, here it is working in a test rig...
https://youtu.be/H-Lp3hXDX0A
If anyone is remotely interested in making one, just chime in here. I can give more details and instructions and software required.
Here is the finished design...
It uses three cheap, off-the-shelf parts easily obtained through eBay.
- ESP8266 Wemos development board ($3 to $5)* - This is a microcomputer that can be programmed to act like a small operating system and host web applications that can be accessed from any Browser - PC, tablet, phone, etc.
- DC-DC converter ($1.30)* - This converts the 12 volts DC of the boat to the 5 volts required by the microcomputer.
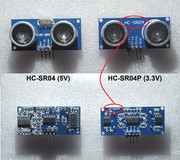
- HC-SR04P Ultrasonic range transducer (< $1)* - This uses sonar to detect the range to some obstruction.
Assembly requires a small amount of soldering. Programming requires a PC and a USB-micro cable. I host/volunteer for a local Maker's group in my small town. One user wanted to use a Mac and I know it can be done, but we couldn't get it working. I don't speak Apple.
I printed a 3D case for it... well... because I can and it was faster, lighter and better looking than one made of wood.
The software is uploaded via the USB the first time.
And lastly, here it is working in a test rig...
https://youtu.be/H-Lp3hXDX0A
If anyone is remotely interested in making one, just chime in here. I can give more details and instructions and software required.