Courageous Mod 4: Electrical Upgrades!
Posted: Mon Mar 25, 2024 1:45 pm
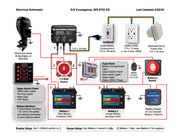
So we’ve completed our principal electrical updates for Courageous. We started with just one 12-volt battery, a 1-2/Both Switch (she came with no #2 battery), and the OEM switch panel. Following a conversation with Todd of BWY, we added:
- A second, house battery
- A house battery on/off switch
- Linked battery 2 to the #2 setting of the 1-2/Both switch
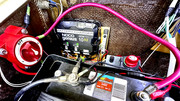
- A negative/ground bus bar (the negative post on battery 1 was beginning to resemble my childhood home’s living room electrical outlet on Christmas Eve!)
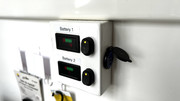
- A pair of battery monitors (See Courageous Mod 3)
- A battery isolator (for minding the charging of batteries while underway)
- A fuse panel for my lighting and other add-ons
- LED tape lighting inside the lip of the battery compartment opening. It’s impossible to overstate how helpful that little upgrade was—especially since I’m prone to losing washers and nuts down there, followed by much cursing. By taping LED lighting around the underside edge of the compartment opening, your hands never create shadows and you can actually SEE what you’re doing.
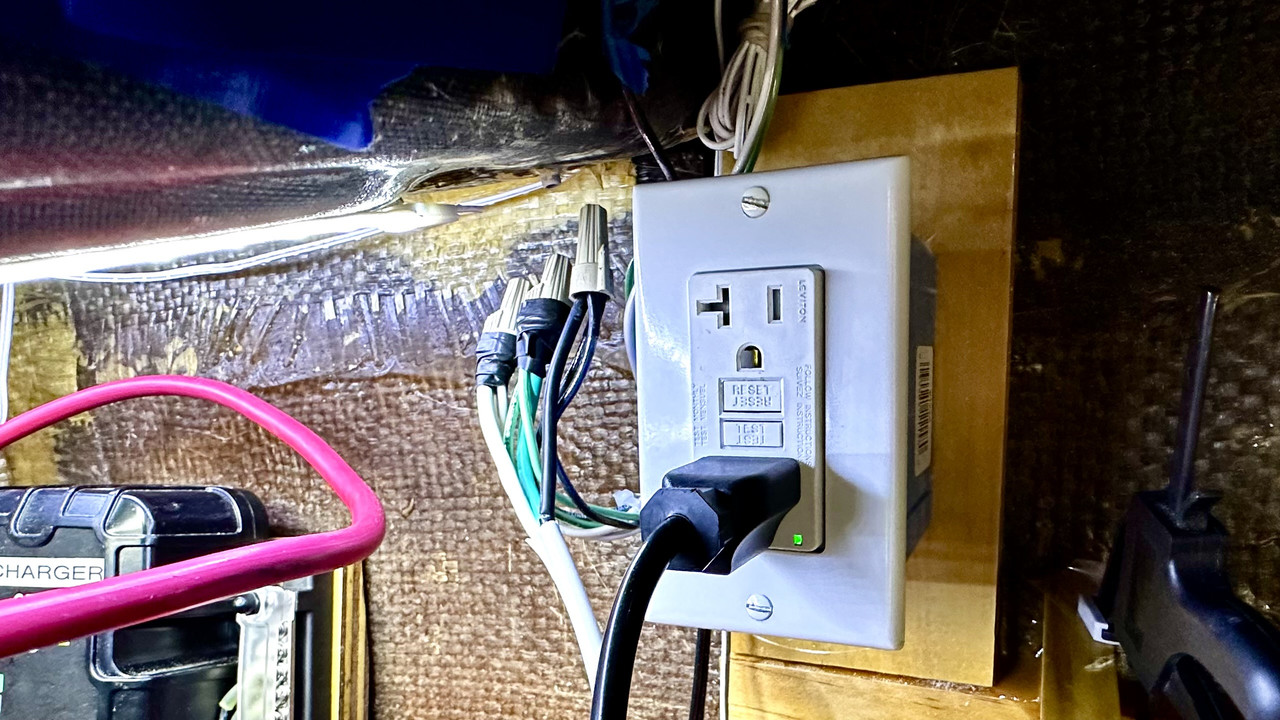
- A ‘smart’ 20 amp, two battery charger (10 amps/battery)
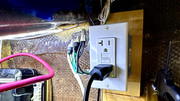
- A pair of 115-volt outlets (one 20 amp outlet inside the battery compartment for the charger, one outside the battery compartment in the galley)
- 30-amp marine wire connecting to our new starboard shore-power inlet (it took two weeks for me to summon the courage to drill a 3” hole in my boat!)
- A pair of stainless steel hinges to the battery compartment/seat panel, facilitating straightforward access.
Please forgive my pride in this complex (for me) upgrade—it was a fair amount of work! And a grateful ‘hat tip’ to Todd of Blue Water Yachts. We’re blessed to live (relatively) nearby BWY. He was more patient and generous with his time than I deserve in thinking through our planned electrical upgrades.
Fred
Mac26X ‘Courageous’
Coupeville, WA USA
- A second, house battery
- A house battery on/off switch
- Linked battery 2 to the #2 setting of the 1-2/Both switch
- A negative/ground bus bar (the negative post on battery 1 was beginning to resemble my childhood home’s living room electrical outlet on Christmas Eve!)
- A pair of battery monitors (See Courageous Mod 3)
- A battery isolator (for minding the charging of batteries while underway)
- A fuse panel for my lighting and other add-ons
- LED tape lighting inside the lip of the battery compartment opening. It’s impossible to overstate how helpful that little upgrade was—especially since I’m prone to losing washers and nuts down there, followed by much cursing. By taping LED lighting around the underside edge of the compartment opening, your hands never create shadows and you can actually SEE what you’re doing.
- A ‘smart’ 20 amp, two battery charger (10 amps/battery)
- A pair of 115-volt outlets (one 20 amp outlet inside the battery compartment for the charger, one outside the battery compartment in the galley)
- 30-amp marine wire connecting to our new starboard shore-power inlet (it took two weeks for me to summon the courage to drill a 3” hole in my boat!)
- A pair of stainless steel hinges to the battery compartment/seat panel, facilitating straightforward access.
Please forgive my pride in this complex (for me) upgrade—it was a fair amount of work! And a grateful ‘hat tip’ to Todd of Blue Water Yachts. We’re blessed to live (relatively) nearby BWY. He was more patient and generous with his time than I deserve in thinking through our planned electrical upgrades.
Fred
Mac26X ‘Courageous’
Coupeville, WA USA